
SSEEdit stands as the essential tool for Skyrim Special Edition modders tackling load order chaos. This powerful editor uncovers hidden conflicts between mods, ensuring your game runs smoothly without crashes or glitches. Whether you’re a beginner stacking essential mods or a veteran optimizing hundreds of files, mastering SSEEdit conflict detection saves hours of troubleshooting. Dive into this comprehensive guide to learn step-by-step methods that pinpoint issues fast. You’ll discover practical techniques boosting your modding workflow efficiency right away.
Understanding mod conflicts proves crucial for immersive Skyrim experiences. Overlapping edits to the same records—like armor stats or NPC behaviors—trigger unpredictable results, from floating textures to quest failures. SSEEdit’s conflict-checking prowess reveals these overlaps visually, empowering precise resolutions. Follow our detailed walkthroughs below to build confidence in managing complex load orders. Transform frustrating bugs into seamless adventures by applying these proven strategies today.
Preparing SSEEdit for Conflict Detection
Launching SSEEdit Correctly
Open SSEEdit through Mod Organizer 2 for seamless integration. Click the executable icon within MO2 to auto-load your active mods. This method ensures accurate plugin representation without manual file hunting. Wait for the full loading process to complete, displaying all ESP/ESM files in the left panel. Double-check the load order matches your MO2 profile for reliable results.
Selecting Relevant Plugins
Highlight plugins prone to conflicts like weapon overhauls or texture packs. Hold Ctrl to multi-select specific files from the left pane. Right-click the selection and choose “Check for Errors” to initiate a quick scan. Focus on mods altering shared assets such as leveled lists or cell records. This targeted approach speeds up detection without overwhelming the tool.
Setting Up Load Order View
Arrange plugins by dragging them in the left panel to mirror your actual load order. SSEEdit displays conflicts based on this sequence, prioritizing later-loading mods. Enable “Apply Filter for Cleaning” under File menu for cleaner views. Toggle “Conflict Status” colors—green for clean, red for conflicts—to spot issues instantly. Save this layout as a preset for future sessions.
Loading Mods into SSEEdit
Building the Plugin List
Access the “Load Order” dialog via the toolbar button resembling stacked files. Check boxes next to each active mod you want to analyze. Uncheck base game files like Skyrim.esm unless editing vanilla records. Click OK to build the list, watching progress bars fill as data loads. This step prepares comprehensive conflict mapping across selected plugins.
Handling Large Mod Lists
For 200+ mods, increase SSEEdit’s memory allocation in settings. Edit the SSEEdit.ini file to set MaxMemoryMB=4096 for smooth performance. Load mods in batches—start with 50, resolve conflicts, then add more. Use “Background Loader” mode to multitask during loading. Monitor RAM usage in Task Manager to avoid crashes mid-process.
Verifying Load Completion
Look for the “Loading Completed” message in the status bar. Expand the left tree view to confirm all selected plugins appear expanded. Right-click the root node and select “Apply Filter for Conflicts” to highlight issues immediately. Scroll through records ensuring no loading errors pop up. Test by copying a record to clipboard—successful paste confirms full readiness.
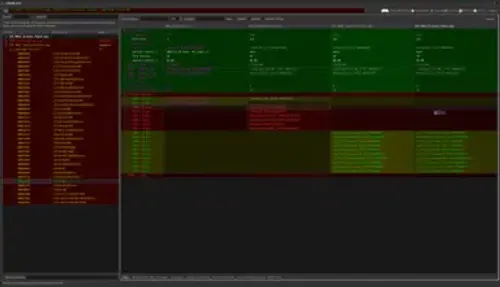
Identifying Conflicts Visually
Understanding Color Coding
SSEEdit uses red backgrounds for winning conflicts where the top plugin overrides others. Yellow highlights indicate hidden conflicts buried under multiple overrides. Green cells show clean records with no overlaps. Blue text marks identical copies across plugins. Master these colors to navigate conflict trees swiftly during inspections.
Navigating the Conflict Tree
Click the right-facing arrow next to a form ID to expand conflict views. Drill down from top-level categories like ACTI (activators) to specific records. Use the up/down arrows to cycle through overriding plugins quickly. Right-click records for “Copy as Override” options resolving issues on the spot. Bookmark frequently checked trees with notes in the messages window.
Spotting Hidden Overlaps
Enable “Show All Conflicts” in View menu to reveal subtle identical edits. Scroll horizontally to compare full record details across columns. Search for records using Ctrl+F with keywords like “armor rating.” Cross-reference with LOOT reports for validation. Flag suspicious identicals by adding comments via right-click menu.
Resolving Common Conflicts
Merging Leveled Lists
- Open the conflicting leveled list record by double-clicking.
- Right-click the top override and select “Copy as Override into…” your bashed patch.
- Drag sub-items from lower plugins upward to include all entries.
- Adjust chances and counts matching original intentions.
- Save and rebuild your bashed patch in Wrye Bash.
Fixing Cell Edit Clashes
Select the cell record showing red conflict status. Copy the winning override to a new ESP file via “Add as New File.” Manually merge navmesh data from each plugin using the vertex tool. Verify placement by checking for gaps in the 3D preview. Test in-game after cleaning orphaned references.
Correcting Script Conflicts
- Locate script records under SCRI category.
- Compare code lines side-by-side in the right pane.
- Copy non-conflicting fragments to a new script override.
- Compile the merged script using Papyrus compiler.
- Attach the new script to the affected object.
Advanced Conflict Checking Techniques
Using Scripts for Automation
Download xEdit scripts from Nexus Mods for leveled list merging. Place .pas files in SSEEdit’s Edit Scripts folder. Run via “Apply Script” on selected plugins. Review generated reports in the protocol window. Customize script parameters for specific mod types like perk overhauls.
Batch Processing Multiple Files
Select all combat mods in the left pane. Right-click and choose “Check for Errors” in batch mode. Export conflict summaries to text file via File > Export. Sort results by conflict count in Excel for prioritization. Re-run checks post-resolution to verify fixes.
Integrating with Other Tools
- Export SSEEdit conflicts to xEditSum for graphical reports.
- Import LOOT sort order directly into SSEEdit.
- Sync with Mod Organizer 2 via virtual file system.
- Use DynDOLOD for exterior cell conflict validation.
- Cross-check with TES5Edit for Oblivion compatibility.
Cleaning and Finalizing Mods
Removing Orphaned Records
Apply “Remove Identical to Master” filter on each plugin. Right-click cleaned records and select “Remove.” Undelete accidentally removed items via Edit > Undo. Run “Check for Errors” post-cleaning to catch strays. Save as a new file version with “_clean” suffix.
Generating Clean Patches
Create a new ESP via File > New. Copy all conflict overrides from analyzed plugins. Rename the patch “ModConflictPatch.esp.” Add to MO2 load order last. Generate forward records for forward compatibility. Test stability with 10-minute in-game session.
Testing Post-Resolution
Load your game with the new load order in MO2. Fast-travel between major cities checking for crashes. Interact with conflicted NPCs and objects. Use console command “tfc” to inspect cells visually. Run BethINI optimization suite afterward for peak performance.
Conclusion
Mastering SSEEdit conflict checks elevates your Skyrim modding game to professional levels. This guide equips you with precise steps—from preparation to advanced automation—resolving issues efficiently. Apply these techniques to maintain stable load orders supporting 500+ mods seamlessly. Enjoy glitch-free adventures exploring Tamriel’s vast world. Regular checks prevent future headaches, ensuring endless hours of immersive gameplay. Start implementing today for immediate improvements in mod compatibility and performance.